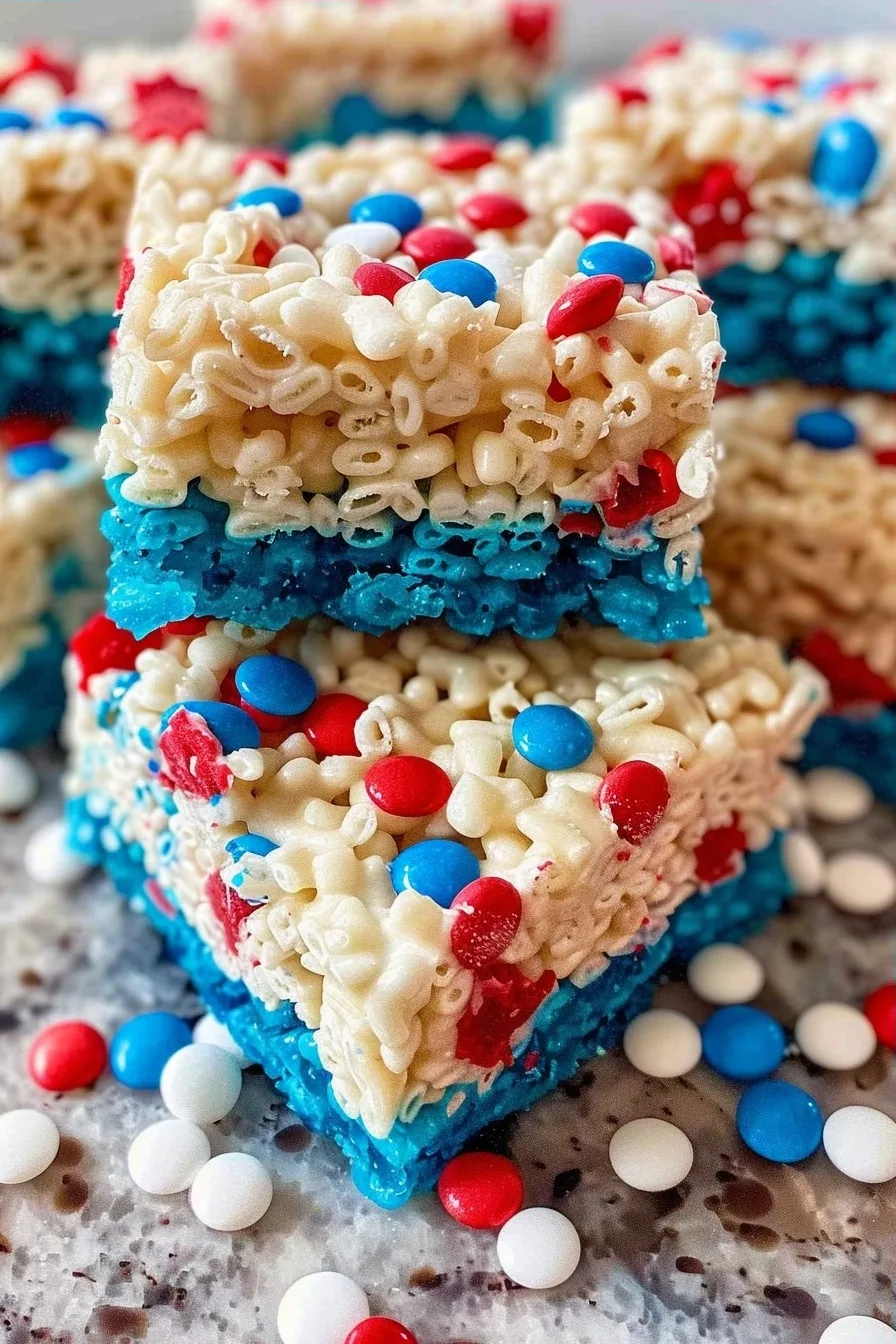
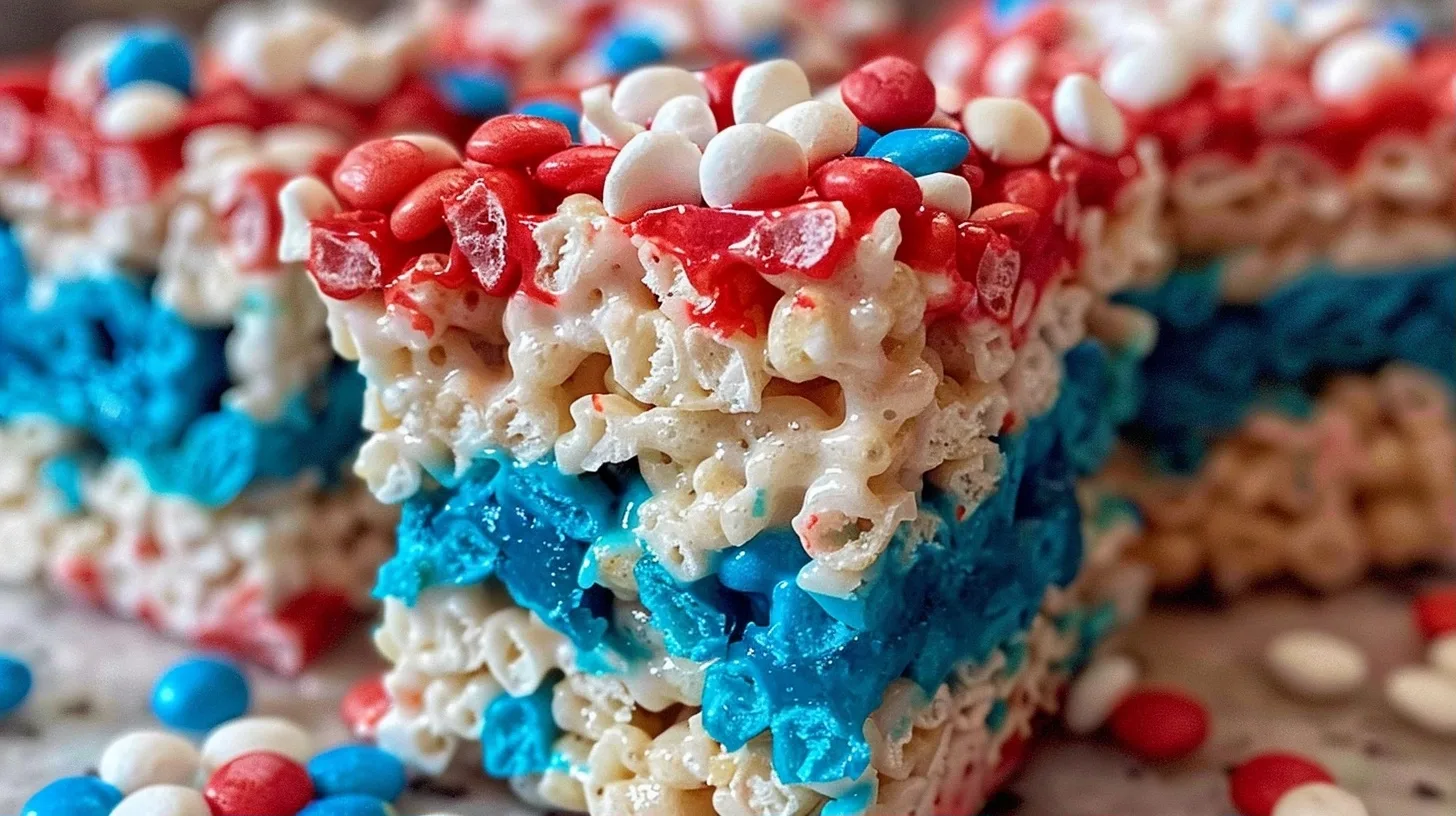
Red White and Blue Rice Krispie Treats are the perfect colorful dessert for patriotic holidays like Independence Day or Memorial Day celebrations. These gooey marshmallow squares layer vibrant food coloring with classic crispy cereal to create a visually striking treat that children and adults adore during summer gatherings. You will find that this simple recipe delivers consistent results every single time you prepare it for guests.
Introduction to Red White and Blue Rice Krispie Treats
Red White and Blue Rice Krispie Treats offer a delightful combination of buttery marshmallow sweetness and the signature crunch of toasted rice cereal. The soft, chewy texture creates a melt-in-your-mouth experience that feels comforting and nostalgic while providing a sophisticated presentation through the bold color layering. Every single bite carries a gentle vanilla aroma that balances the rich dairy notes of high-quality unsalted butter used throughout the preparation process.
This specific treat builds upon the classic recipe by introducing modern techniques like microwave melting and strategic layer construction for a cleaner look. While traditional versions are mixed into one large uniform batch, this patriotic variation requires intentional assembly to separate the distinct colored sections effectively. The culinary context here emphasizes celebration and national pride, making this dessert a reliable choice for outdoor picnics or neighborhood block parties where finger foods are preferred.
Home bakers looking for a reliable, crowd-pleasing dessert will find this recipe suits many occasions including birthdays, school events, and summer holiday festivities. It deserves a permanent place in your weekly recipe rotation because it requires minimal equipment and utilizes pantry staples that are easy to keep on hand. You can rely on this dish to provide a consistent sugary finish to any meal, ensuring you always have a sweet option ready when company arrives at your home.
Why You’ll Love This Recipe
The primary reason you will love this recipe is the streamlined preparation method that uses individual microwave bursts to ensure perfectly smooth marshmallow consistency. This technique preserves the delicate aeration of the marshmallows, which prevents the final treat from becoming too dense or hard after cooling. Achieving a light and airy texture is the key to creating a professional-quality dessert that keeps everyone coming back for another piece.
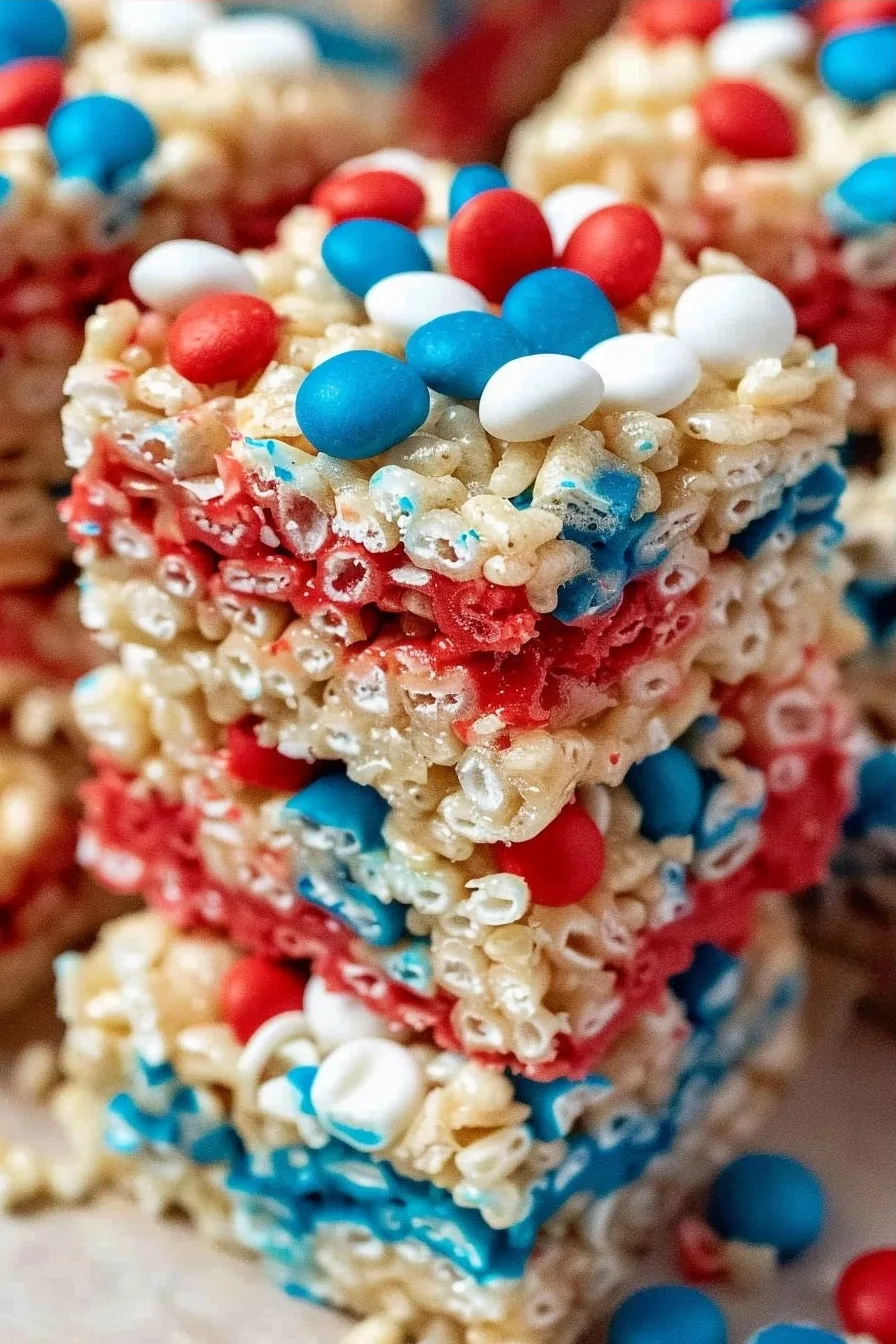
You will appreciate the visual appeal of these treats because the distinct layers provide a bright aesthetic that stands out on any dessert buffet table. The contrast between the crispy cereal texture and the soft, sticky marshmallow binder creates a sensory experience that satisfies multiple hunger levels simultaneously. These treats are visually stunning and taste just as good as they look, making them a centerpiece for your next social event.
The Perfect Weeknight Dinner
Red White and Blue Rice Krispie Treats serve as the ultimate quick dessert because the entire process is ready in under 45 minutes of total time. You simply need to divide your ingredients, melt them in quick bursts, and press them into a pan to achieve success. The minimal steps involved mean you spend less time cleaning up the kitchen and more time enjoying your finished creation with family or friends.
Busy parents will find this recipe highly effective for meal prep because the treats stay fresh for several days when stored in an airtight container. Beginner cooks should start their journey with this dish, as it teaches basic heat control and material handling without requiring complicated baking equipment. Whether you are prepping for a school bake sale or just craving something sweet, this flexible method ensures a perfect result with very little active effort required.
Ingredients Needed for Red White and Blue Rice Krispie Treats
Main Ingredients
The success of these treats depends on using fresh, soft marshmallows and high-quality butter to create the ideal binder for your cereal.
| Ingredient | Quantity | Notes |
|---|---|---|
| Unsalted Butter | 6 Tablespoons | Provides essential moisture and richness |
| Mini Marshmallows | 15 cups | Acts as the primary sweet binder |
| Rice Krispies | 9 cups | Main structural crispy component |
| Red Food Coloring | To taste | Used for the bottom patriotic layer |
| Blue Food Coloring | To taste | Used for the middle patriotic layer |
Optional Add-Ins
Customizing your dessert allows you to tailor the flavor profile to match specific themes or personal preferences for your guests. These additions introduce extra texture and bursts of sweetness that elevate the simple base recipe into a more decadent confection.
| Ingredient | Quantity | Notes |
|---|---|---|
| Festive Sprinkles | 1/4 cup | Adds crunch and decorative flair |
| M&Ms | 1/2 cup | Introduces chocolate flavor and color |
| Vanilla Extract | 1 teaspoon | Enhances the overall sweetness profile |
| Sea Salt | 1/4 teaspoon | Balances the sugar and butter |
Ingredient Substitutions
- Unsalted butter can be replaced with salted butter, but you must omit any additional salt to prevent an overly savory result.
- Mini marshmallows are essential for melting; using large marshmallows will increase your prep time and lead to uneven melting results.
- Rice Krispies can be swapped for corn-based crispy cereal, though this will slightly alter the neutral flavor profile of the treats.
- Food coloring gel is better than liquid drops because it provides more intense color without thinning the marshmallow binder consistency.
Step-by-Step Cooking Instructions
Proper preparation begins with readying your work surface so you can move quickly once the marshmallows reach the ideal melted temperature. Following these phased instructions ensures each layer adheres to the next while maintaining distinct, vibrant color zones throughout the final block.
Preparing the Initial Layer
Start by buttering a standard 9×13 inch baking dish to ensure the treats do not stick when you are ready to cut them. Place 2 tablespoons of butter and 5 cups of marshmallows into a microwave-safe bowl and heat for exactly one minute. Stir the mixture vigorously until it reaches a smooth, liquid state that is free of any lumps or stubborn clumps. Add a few drops of blue food coloring until you reach your desired shade and stir in 3 cups of cereal before pressing it into the dish.
Creating the Secondary and Final Layers
Repeat the previous melting process using fresh butter and marshmallows, this time incorporating the red food coloring once the mixture is smooth. Stir in another 3 cups of rice cereal and press this mixture firmly on top of the blue layer using wax paper. Finish by melting the final portion of butter and marshmallows without any color additives to create a pristine white top layer for your treats. Press this final mixture over the red layer to complete the assembly and allow the entire block to set properly.
Setting and Finishing
Once the layers are assembled, immediately apply your optional sprinkles or chocolate candies to the top while the marshmallow is still tacky. Cover the dish with plastic wrap to maintain the soft texture and prevent the cereal from absorbing excess ambient moisture from the kitchen air. Wait for the mixture to reach room temperature before you attempt to slice the block into individual portions for serving. Use a well-buttered plastic knife to cut straight, clean lines that preserve the appearance of your three distinct patriotic colored layers.
Pro Tips
Mastering these treats requires attention to detail regarding temperature and the handling of the sticky marshmallow mixture during the assembly phase. These specific techniques will ensure your results remain consistent regardless of how many times you decide to prepare this recipe for your guests.
- Always butter your hands or the back of a spoon to prevent the sticky marshmallow from adhering to your skin or tools during pressing. This step is critical because sticky hands will pull your carefully arranged layers apart and ruin the visual aesthetic of the final block.
- Work in small batches to ensure you have enough time to press each layer before the mixture begins to cool and set too firmly. If the marshmallow cools, it becomes brittle and difficult to spread, leading to uneven layers that do not hold together properly when sliced.
- Use a plastic knife instead of metal when cutting through the finished treat to reduce the amount of drag and stickiness during service. Metal blades tend to pull the cereal apart, whereas a lightly buttered plastic knife glides through the marshmallow with minimal resistance.
- Select high-quality food coloring gels rather than liquid supermarket dyes to achieve deeper colors without needing to use large, texture-altering amounts of liquid. Liquid dyes can make the mixture runny and cause the color to bleed between layers if you use too much.
- Place the finished dish in a cool area rather than the refrigerator to let it set naturally without making the marshmallows hard or stale. Refrigeration can often cause the sugars to crystallize, which changes the intended soft, chewy texture of these classic, comforting treats.
The most important technique is ensuring the marshmallows are fully melted but not overheated, which preserves their structural integrity for the best final texture. Overheating the marshmallows removes too much moisture, leading to a hard and brittle treat that lacks the signature stretch expected from this recipe. Keep a close watch on your microwave timer and always stir frequently to distribute the heat evenly throughout the mixture for a perfect result.
Serving Suggestions and Variations
Pairing with Sides
These treats serve well alongside light refreshments like fresh fruit skewers to provide a balanced contrast to the dense, sweet nature of the marshmallow. Consider serving them with a batch of Homemade Lemonade to cut through the sugar with a refreshing, acidic citrus profile that refreshes the palate. You might also include a side of Vanilla Bean Dip to encourage guests to customize their portion even further if they have a strong sweet tooth. This combination of textures ensures a diverse dessert spread that caters to various preferences during your holiday celebration or summer backyard barbecue.
Creative Variations
For a spicy variation, fold a pinch of cayenne pepper or cinnamon into the marshmallow mixture before adding the cereal for a surprising heat element. This unexpected warmth balances the sweetness of the marshmallow binder and adds a layer of depth that appeals to adult palates during evening gatherings. Be sure to mix the spice thoroughly with the melted butter to ensure the flavor is distributed evenly throughout the entire colored layer.
Swap the classic rice cereal for cocoa-infused cereal to create a chocolate-forward version that pairs perfectly with the red and blue colored marshmallows. You can also incorporate crushed pretzels into the cereal mixture to introduce a salty, savory contrast that highlights the sweetness of the marshmallows even more clearly. Experimenting with different cereal shapes can also change the mouthfeel of the final treat, making it feel entirely different for your guests.
Check out our other favorite dessert guides like Classic Chocolate Chip Cookies and Easy Berry Parfaits for more inspiration. If you need a more decadent finish to your meal, a scoop of Homemade Vanilla Bean Ice Cream provides the ideal temperature contrast. Enjoy your dessert making process and feel free to share your own variations with our community online for others to try soon.
FAQ
How can I make these treats without using food coloring?
You can make these treats without food coloring by simply leaving the marshmallow mixtures in their natural white state for every layer. This creates a monochromatic look that focuses purely on the buttery, vanilla-forward flavor profile of the marshmallows and crispy rice cereal combination. The texture and taste remain exactly the same as the colored versions, providing a classic and clean presentation for any occasion. Simply omit the drops of dye and follow the melting instructions exactly as written for the best results.
Can I replace the rice cereal with a gluten-free option?
You can substitute the standard rice cereal with a certified gluten-free puffed rice cereal found in most major grocery store health sections. These alternatives provide the same crispy texture and neutral flavor profile as the traditional version while ensuring the recipe remains safe for your gluten-sensitive guests. Ensure that you check the label of your specific marshmallow brand to confirm they are processed in a gluten-free facility as well. This small adjustment allows you to serve all your friends regardless of their dietary restrictions while maintaining the original integrity of the dessert.
How long will these marshmallow treats stay fresh?
These treats will stay fresh for up to one week when stored in a tightly sealed container at room temperature in a cool place. You must keep them away from direct sunlight and humidity, as excess moisture will cause the cereal to lose its signature snap and become soft. If you notice the treats becoming slightly firm, you can warm them in the microwave for five seconds to restore the original chewiness. For the best quality, avoid storing them in the refrigerator, as the cold environment can lead to the marshmallow becoming hard and stale.
What is the best way to make these ahead of time?
The best way to make these ahead is to prepare the layers, slice them completely, and store them in an airtight container separated by layers of parchment paper. By using parchment paper, you prevent the sticky surfaces from bonding together, ensuring that you can easily pull out individual squares when you are ready to serve. You can safely prepare these up to two days before your event without losing any significant quality or texture in the final product. Keep the container in a dark, temperate spot in your kitchen pantry to maintain the ideal balance of softness and crunch.
Why are my treats turning out too hard or brittle?
Your treats are likely turning out hard because the marshmallows were overheated during the melting phase, which drives off too much moisture. When the sugar in the marshmallows gets too hot, it creates a stiff, crystalline structure that lacks the desired soft, chewy consistency. To fix this, reduce your microwave heat settings or shorten your timing intervals to ensure the marshmallows only melt until they become smooth. Always use fresh, soft marshmallows from a new bag to ensure the water content is sufficient for the perfect texture in every batch.
Red White and Blue Rice Krispie Treats
Ingredients
Method
- Prepare a 9x13 inch baking pan by lining it with parchment paper or greasing it lightly.
- Divide the marshmallows, butter, and cereal into three equal portions to create separate layers.
- For the first layer, melt 8 oz of marshmallows with 2 tbsp of butter in the microwave for 60 seconds; stir until smooth.
- Add a few drops of red food coloring to the marshmallow mixture and stir until evenly colored.
- Fold in 3 cups of crispy rice cereal until well coated.
- Press the red mixture firmly into the bottom of the prepared pan and repeat the process with the white layer (no coloring) and the blue layer.
- Allow the treats to set at room temperature for at least 30 minutes before cutting into squares.
Nutrition
Notes
To prevent sticking, lightly grease your spatula or hands with butter when pressing the layers into the pan.
Store in an airtight container at room temperature for up to 3 days.
Do not overheat the marshmallows in the microwave as it can make them harden upon cooling.